How to choose a PSU

How to Choose a Power Supply Unit (PSU) for Your PC
A complete guide covering size, wattage, connectors, quality and efficiency — everything you need to make the right choice.
The power supply unit (PSU) is the heart of every PC — yet it is often the most overlooked component when building or upgrading a system. Choose the wrong one and you risk system instability, data loss, or hardware damage. Choose the right one and your computer will run quietly, efficiently and reliably for years.
The good news is that most PSUs are highly interchangeable. In the majority of cases, you do not need to replace a faulty power supply with the exact same model number. Many large PC manufacturers charge a premium for their branded PSUs when a high-quality compatible unit can do the same job at a fraction of the cost.
There are five key things to check when choosing a PSU: Size, Power Output, Specifications, Quality and Connectors. This guide walks you through each one clearly.
Physical Size & Form Factor

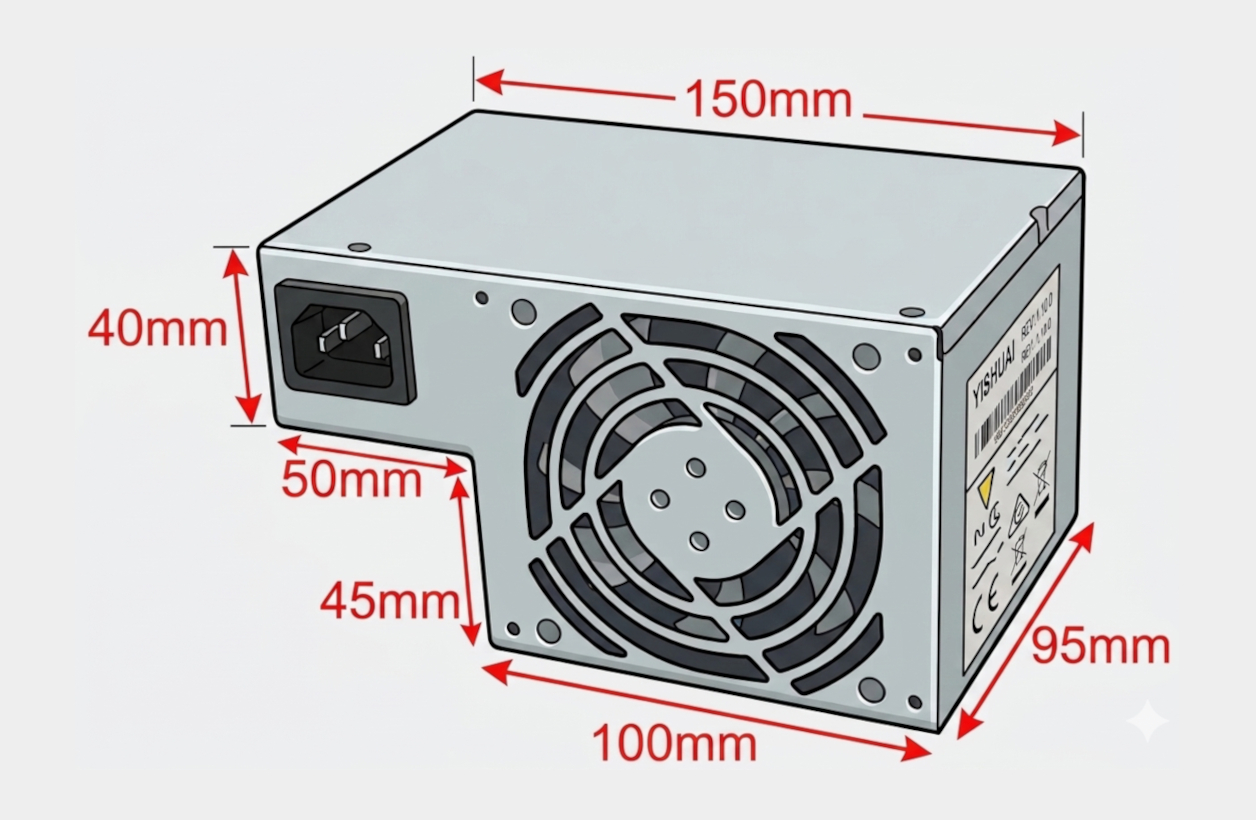
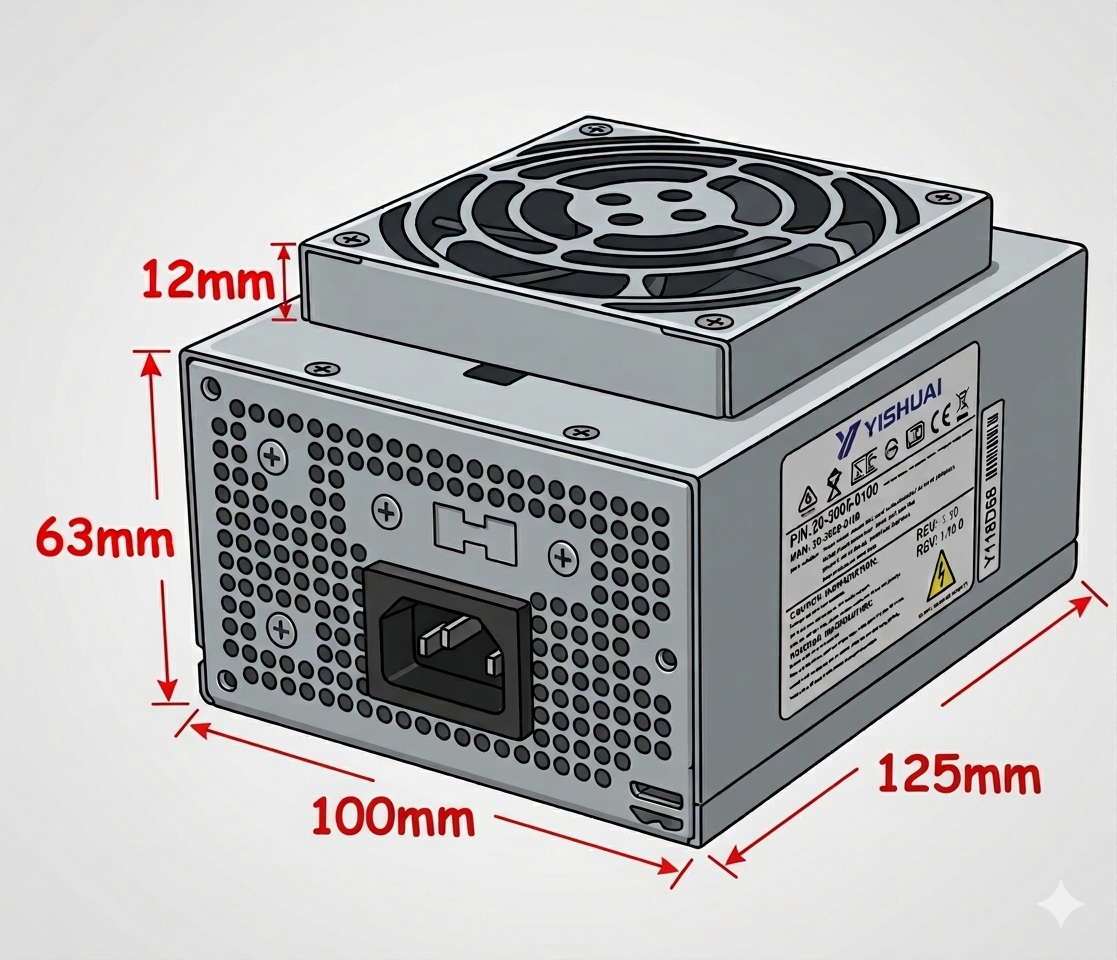
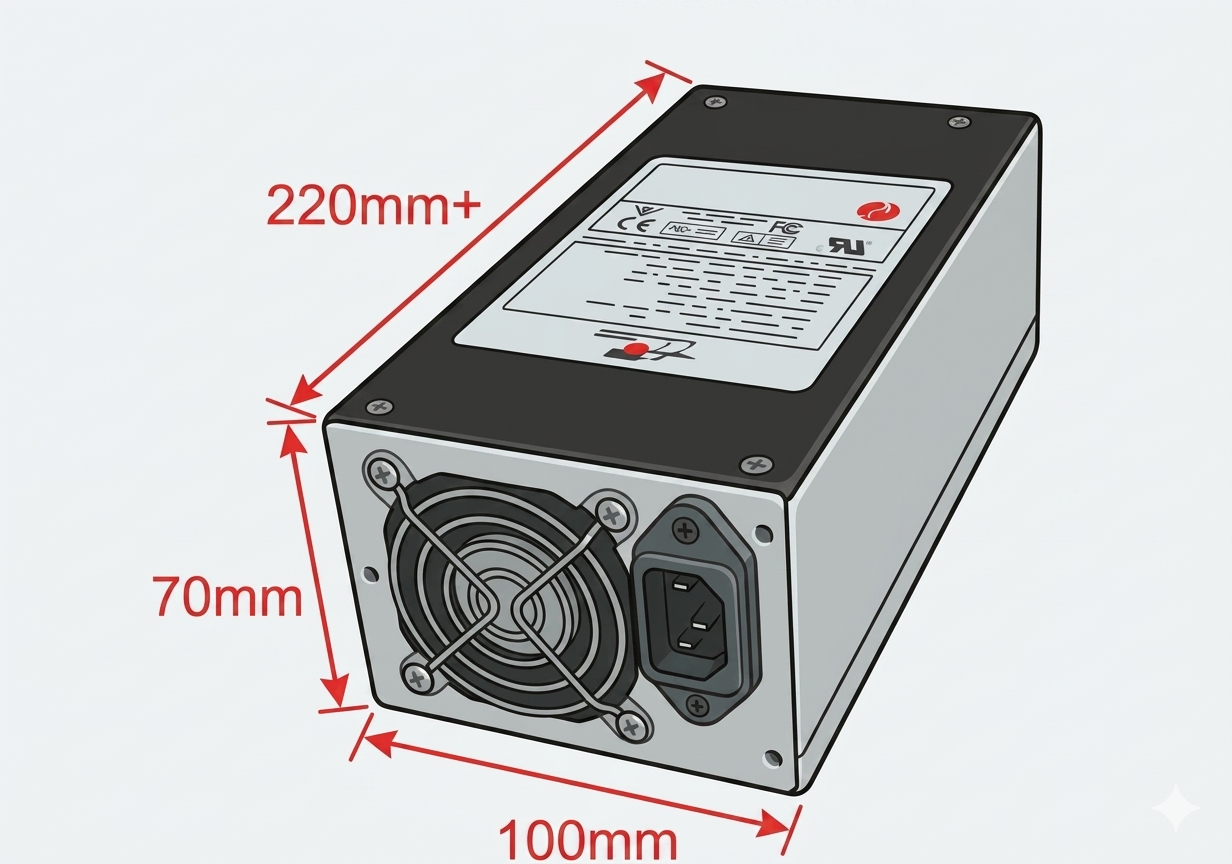
Common PSU form factors (ATX PS2, SFX, TFX, 1U)
The physical size of a PSU is the single most important thing to check before purchasing. No matter how powerful or feature-rich a unit is, it cannot be used if it does not fit inside your PC case. The screw positions and overall dimensions must match your existing PSU or chassis mounting points.
PSUs come in several standardised form factors. Below are the most common types, with their typical dimensions:
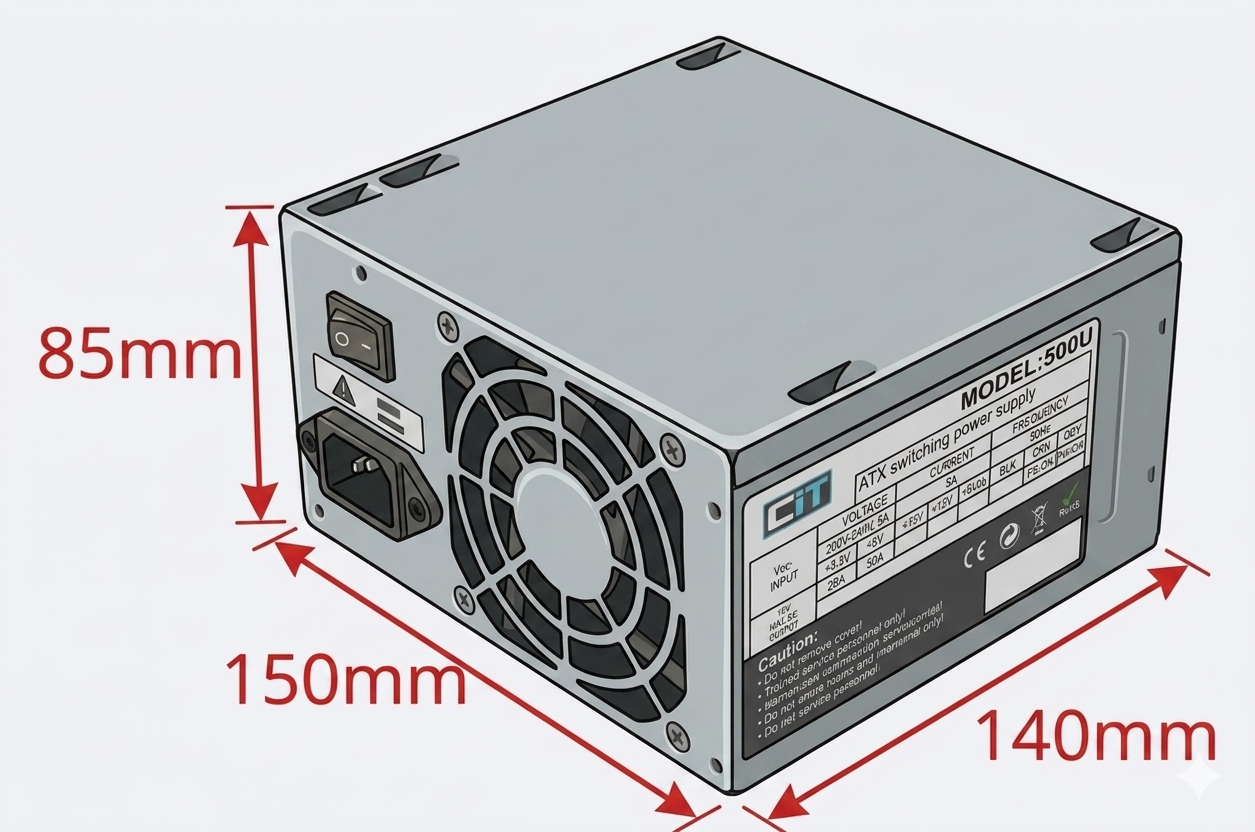
The most common standard. Used in the vast majority of desktop towers and mid-tower cases.
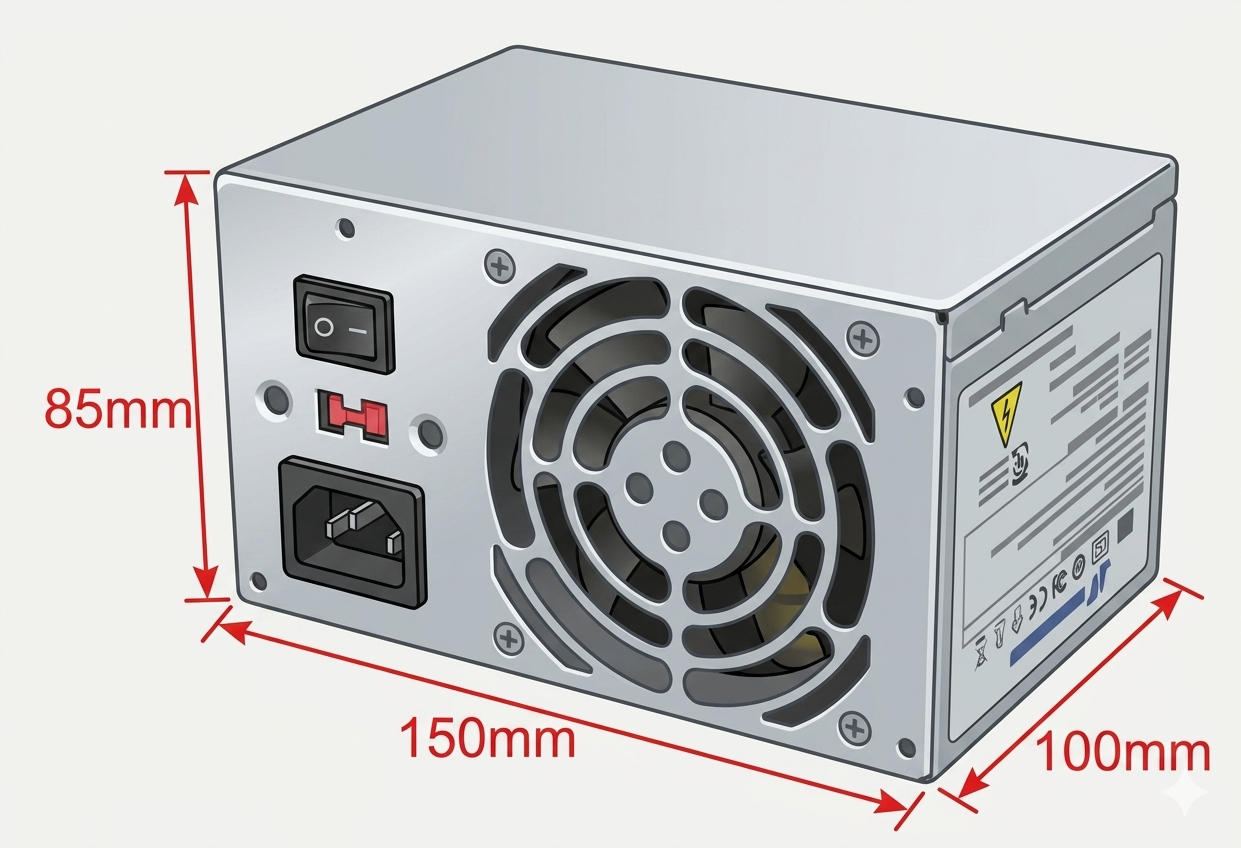
A shorter ATX variant. Used in compact desktop systems where depth is limited.

Thin Form Factor. Common in slimline desktops, SFF builds, and branded retail systems.
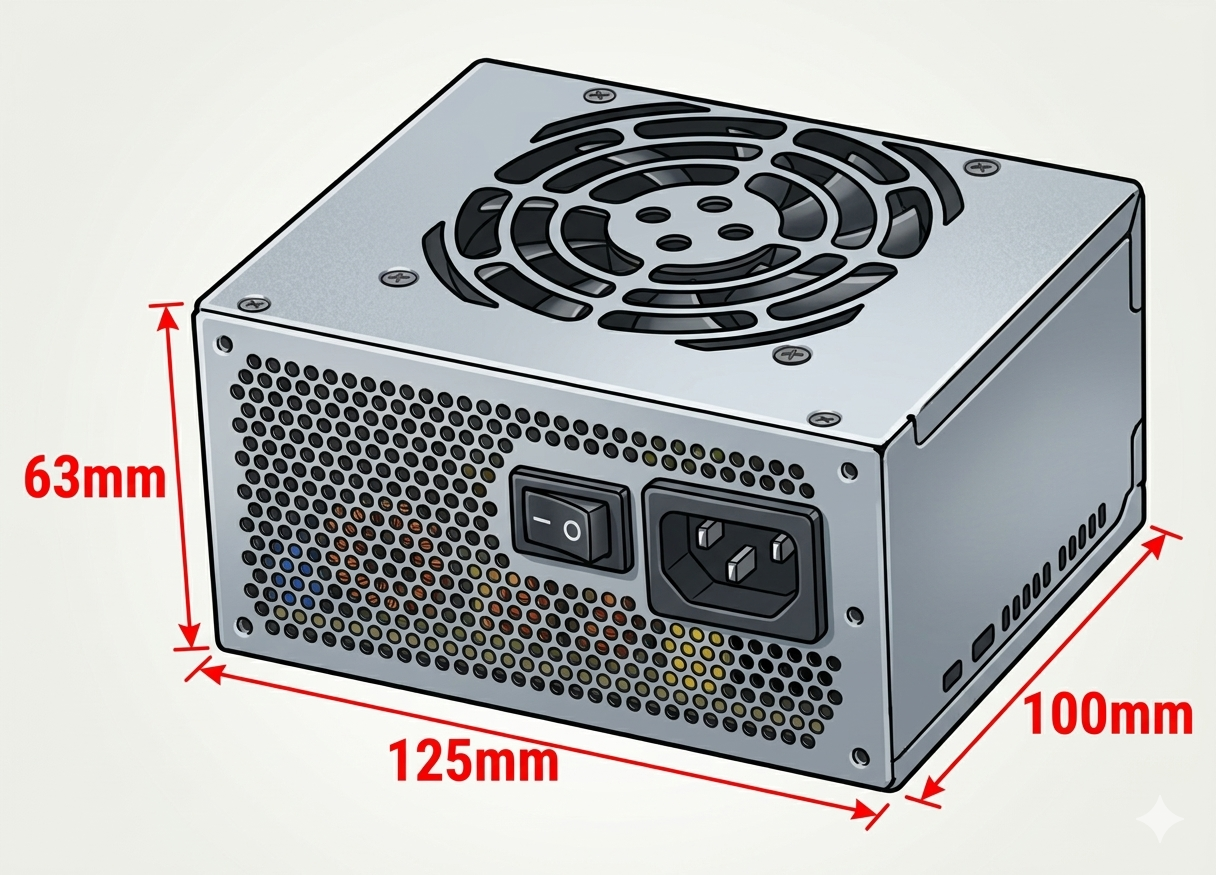
Small Form Factor. Used in compact Mini-ITX cases and ultra-small gaming builds.
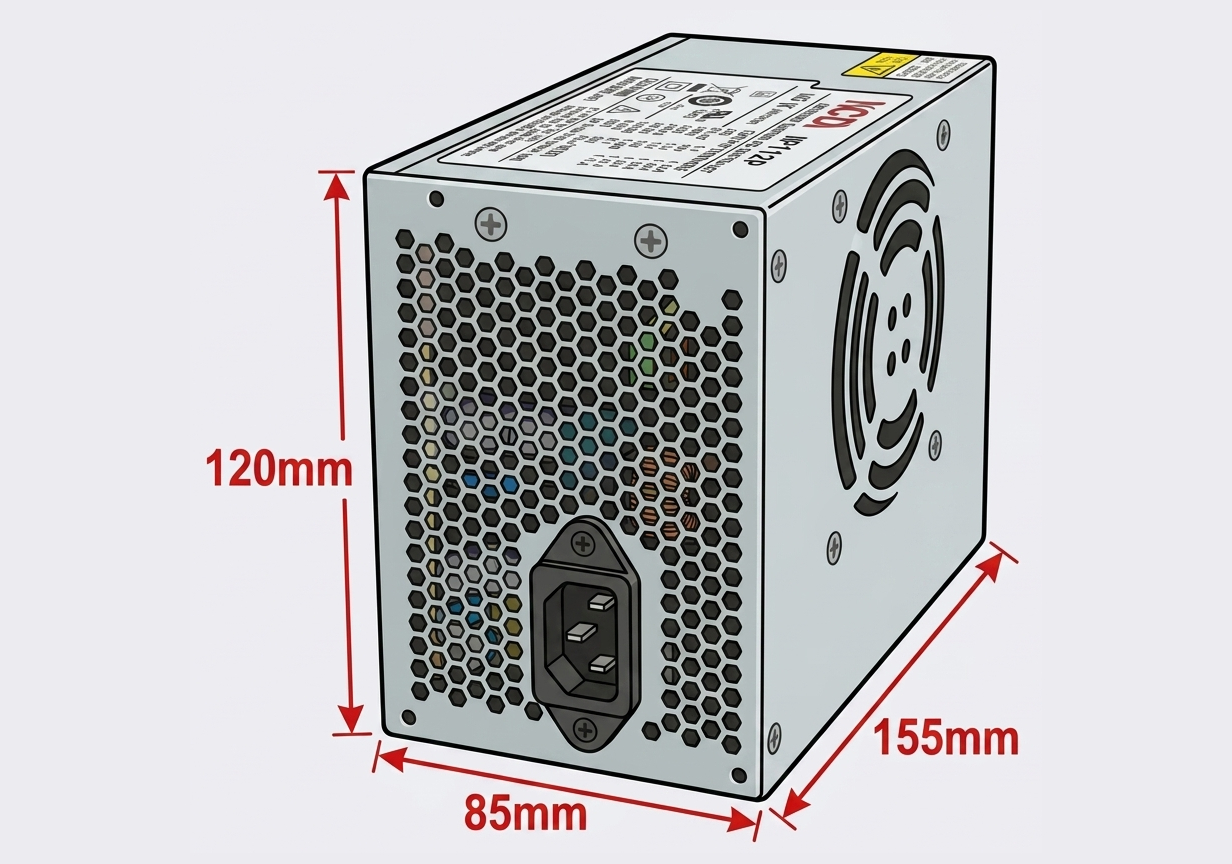
Thinner than standard ATX. Found in branded slim desktops such as HP and Dell.

Designed for 1U rack-mount servers and compact POS/EPOS systems.
Less common. Found in certain branded compact desktop machines.

Older standard for legacy PCs. Uses P8 & P9 connectors with a physical on/off switch.
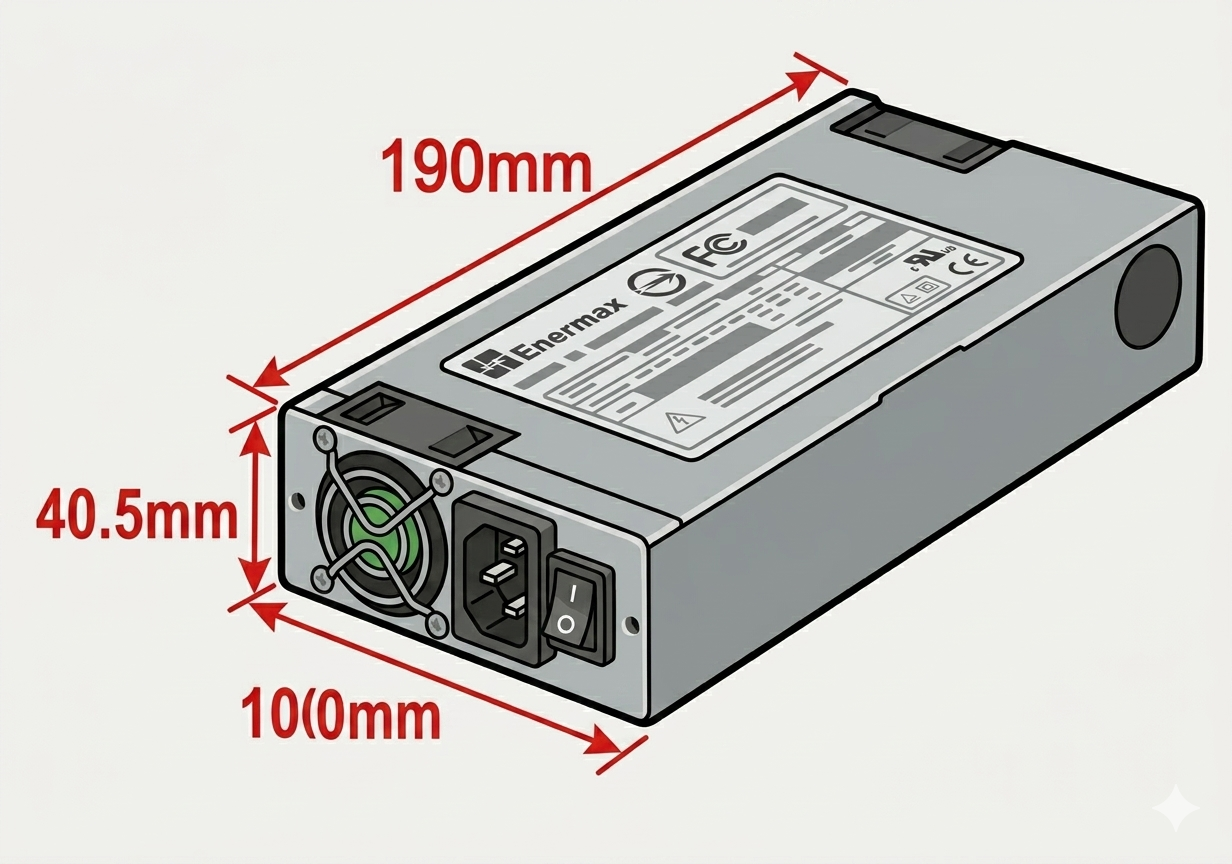
Designed for 1U rack-mount servers and NAS.
SFX PSU with the power socket on the short side.
Used in 2U industrial rack-mounts with limited height.
How to Identify Your PSU Size
If you are replacing an existing PSU, measure your current unit and note its form factor label (usually printed on the side sticker). Measure width, height, and depth in millimetres, and check that the screw hole positions match.
- Standard ATX PS2 units are almost universally interchangeable — if you have a regular mid-tower case, this is almost certainly what you need.
- For slim or compact branded PCs (HP, Dell, Lenovo, etc.), cross-reference your model number with a compatibility guide, as these often use TFX, SFX, or proprietary variants.
- The form factor label is almost always printed on the sticker on the side of the PSU. Look for text like “ATX”, “TFX”, “SFX” or the dimensions in millimetres.
- When in doubt, photograph your existing PSU and its label and send it to us — we can identify the right replacement.
Power Output: How Many Watts Do You Need?

The wattage rating is printed on the PSU label
The wattage rating of a PSU indicates its maximum power delivery capacity. One commonly misunderstood point: your computer only ever draws the amount of power it actually needs. A 600W PSU in a PC that uses 200W will not waste extra electricity or cause any damage — the unused capacity simply sits in reserve.
This means it is always sensible to choose a PSU with some headroom above your requirement. This protects against future upgrades and ensures the PSU does not run at maximum load continuously (which shortens its lifespan).
General Wattage Guidelines by Use Case
- Basic home or office PC (browsing, documents, email): 250–350W is typically sufficient.
- Mid-range gaming PC with a dedicated GPU: 450–550W provides comfortable headroom.
- High-end gaming or content creation with a powerful CPU and GPU: 650–850W recommended.
- Workstations, servers, or NAS systems: 400–600W depending on drive count and CPU load.
- Bitcoin miners and compute rigs: Power demands vary widely — always calculate based on specific hardware.
How to Calculate Your PC’s Power Consumption
Add up the TDP (Thermal Design Power) ratings of each major component: CPU, GPU, RAM, and storage drives. Most manufacturers publish these figures in their specifications. Then add approximately 20–30% as a safety margin to ensure the PSU is never strained at peak load. Online PSU calculators (from Corsair, OuterVision, etc.) can automate this if you enter your component list.
Connectors: Powering Your Components

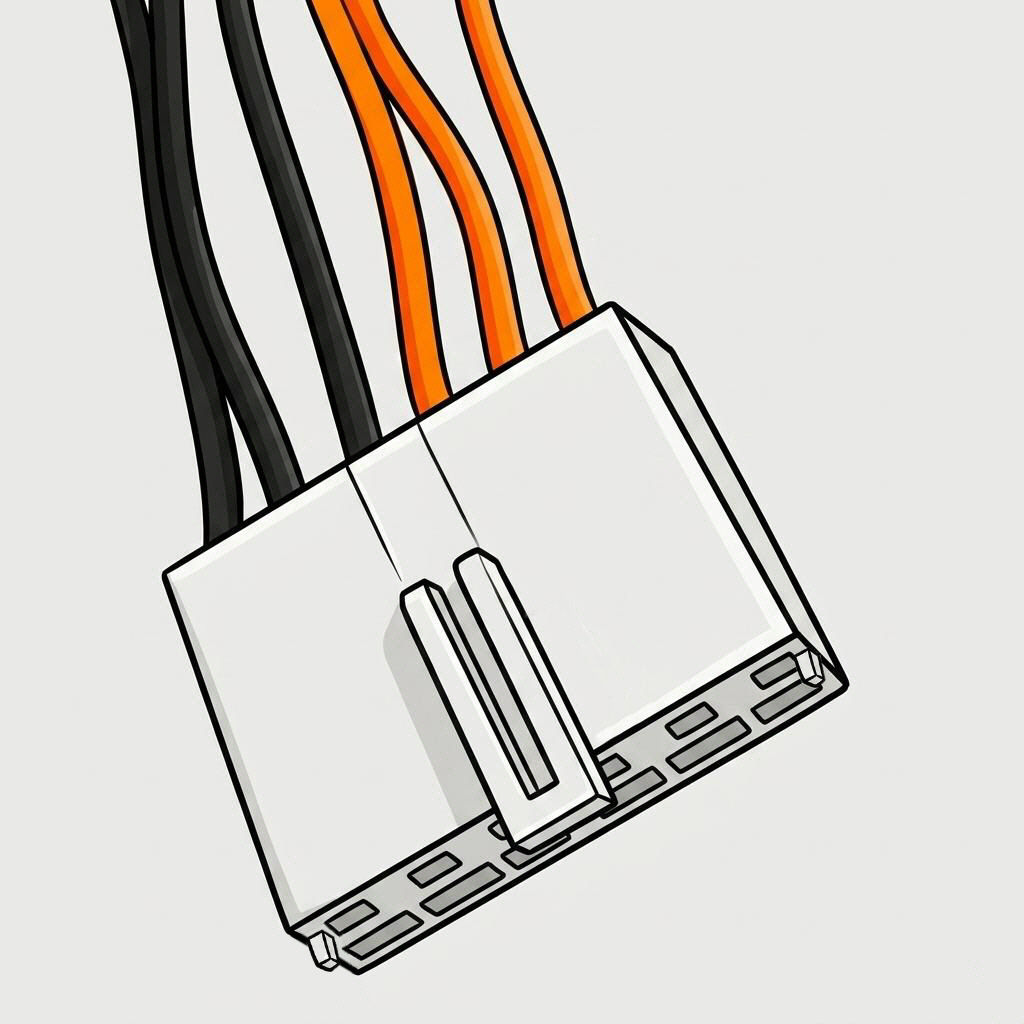
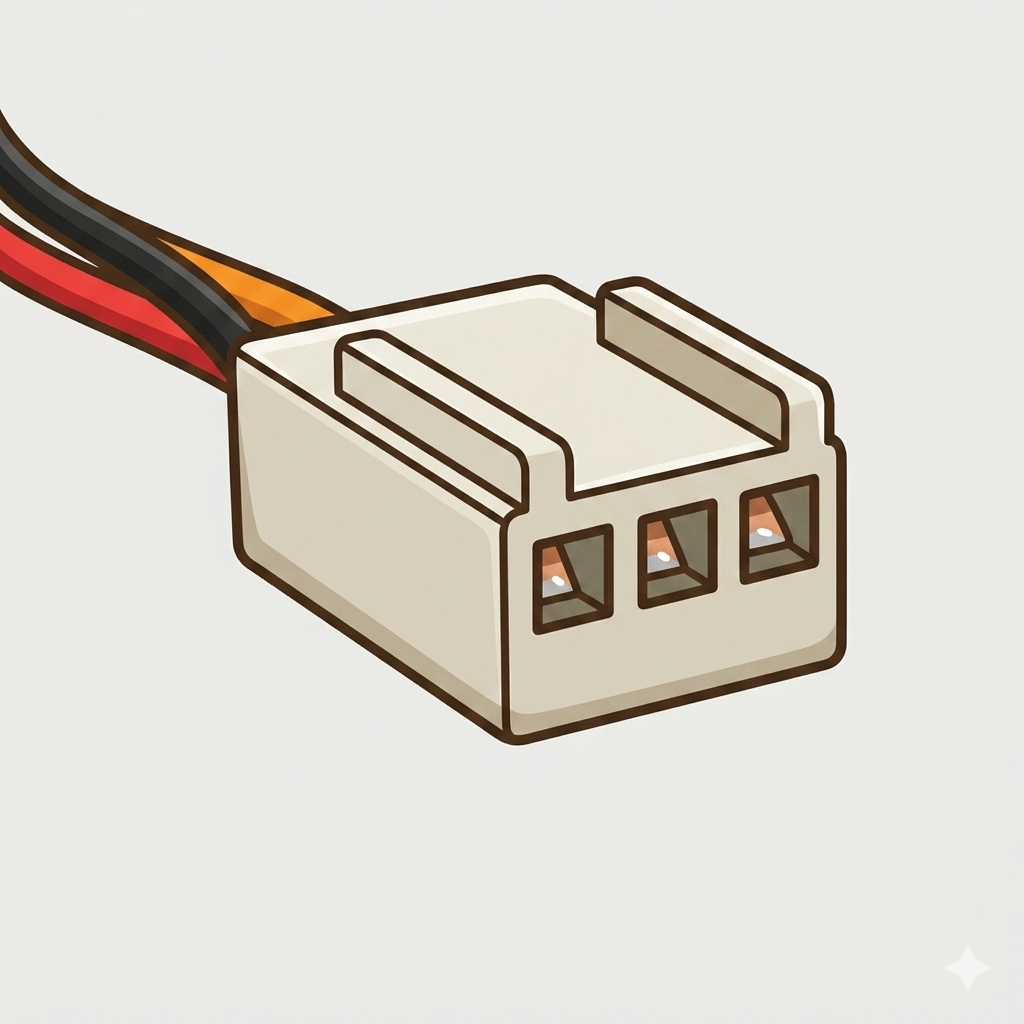
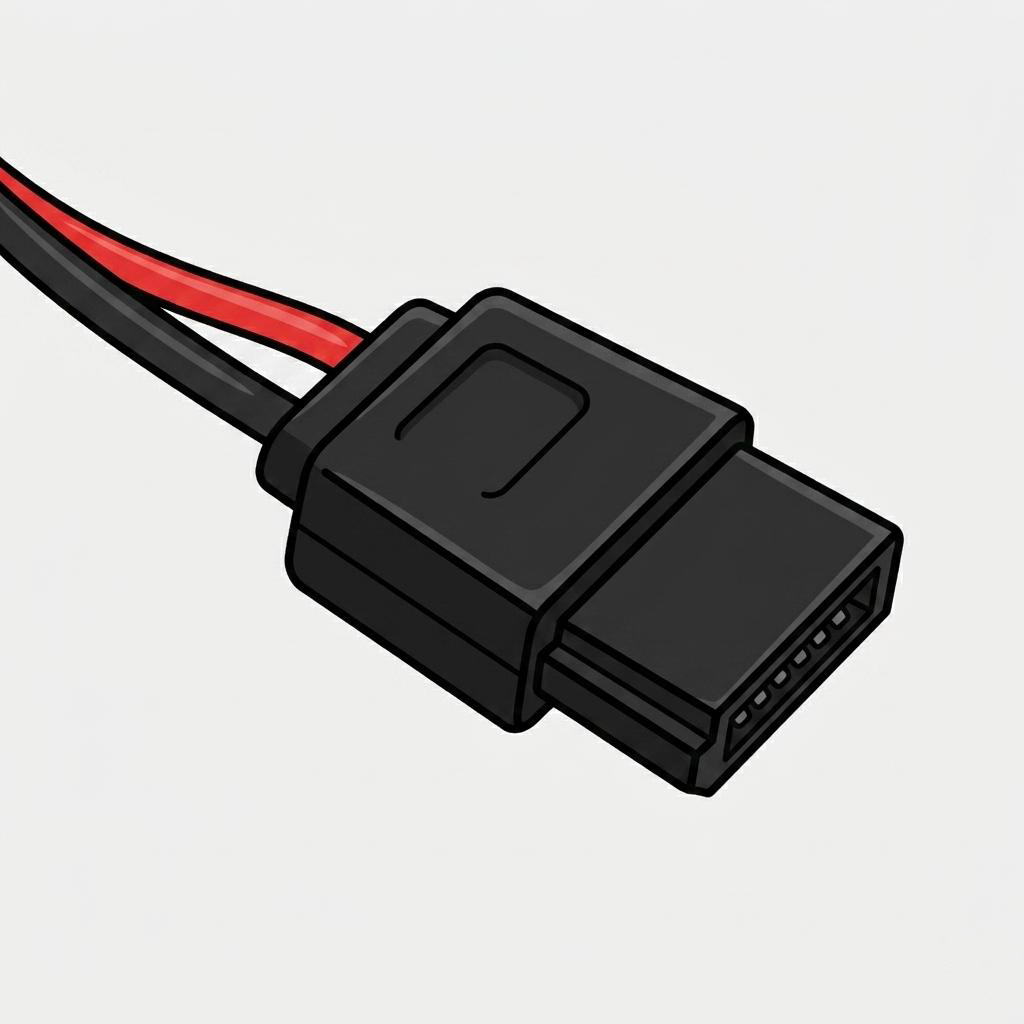
Common PSU connectors: 24-pin ATX, EPS, PCIe, SATA
Every component in your PC requires a specific power connector. Most modern PSUs include all standard connectors required for most computers. PSU connectors are keyed — each has a unique shape making incorrect insertion virtually impossible. Any unused connectors can simply be tied neatly to the side; they pose no risk.
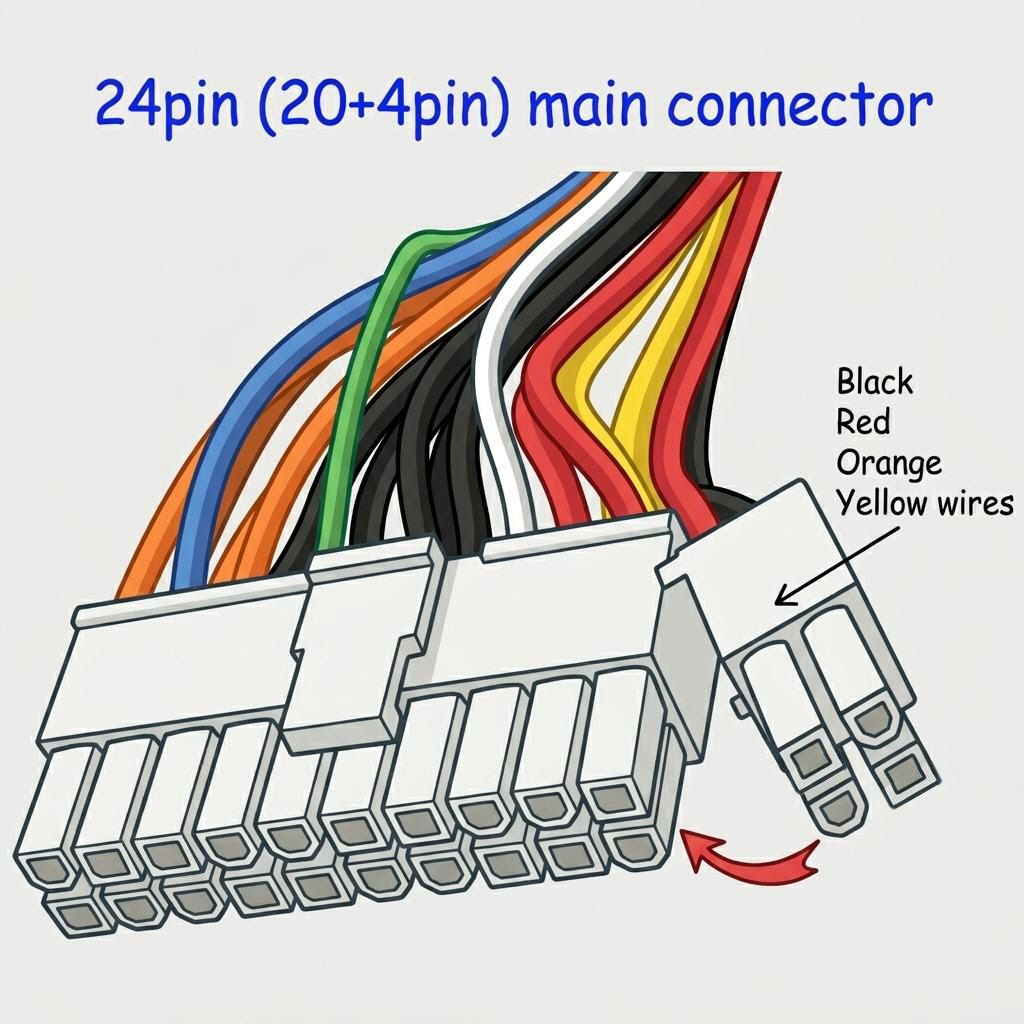
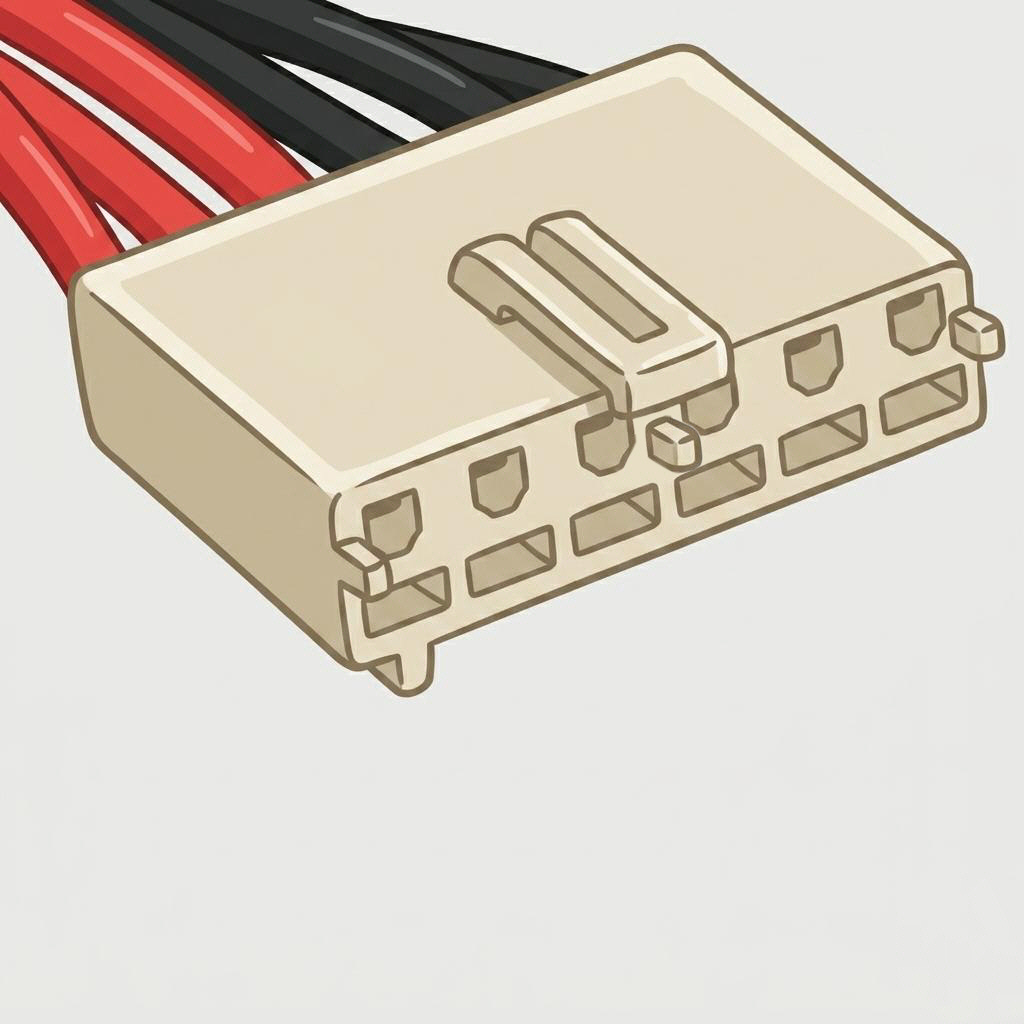
Primary power for the motherboard. Found on virtually every modern desktop. Some older boards use 20-pin; most 24-pin connectors are backward-compatible (the extra 4 pins detach).
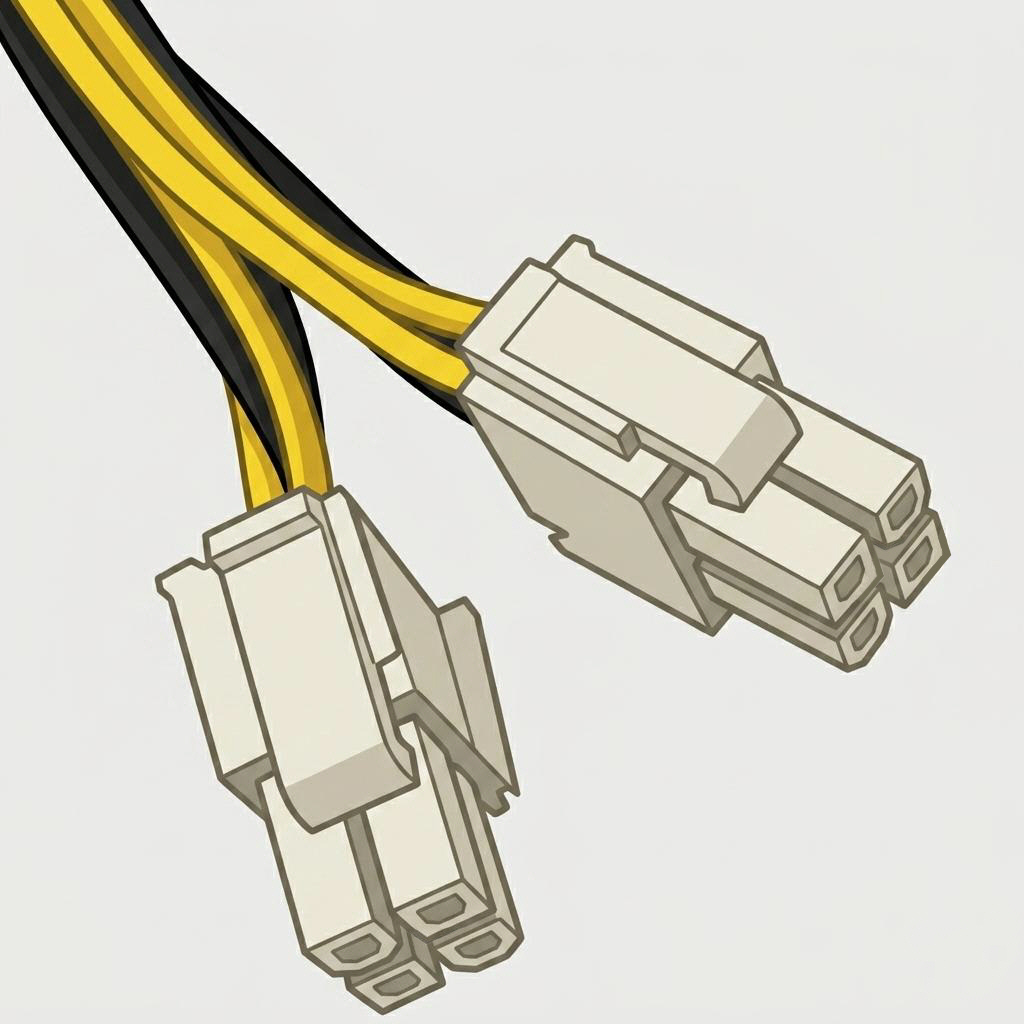
Supplies power directly to the processor. Modern CPUs typically need 8-pin (or dual 8-pin) EPS. Do not confuse this with the similarly-shaped PCIe GPU connector — they are not interchangeable.
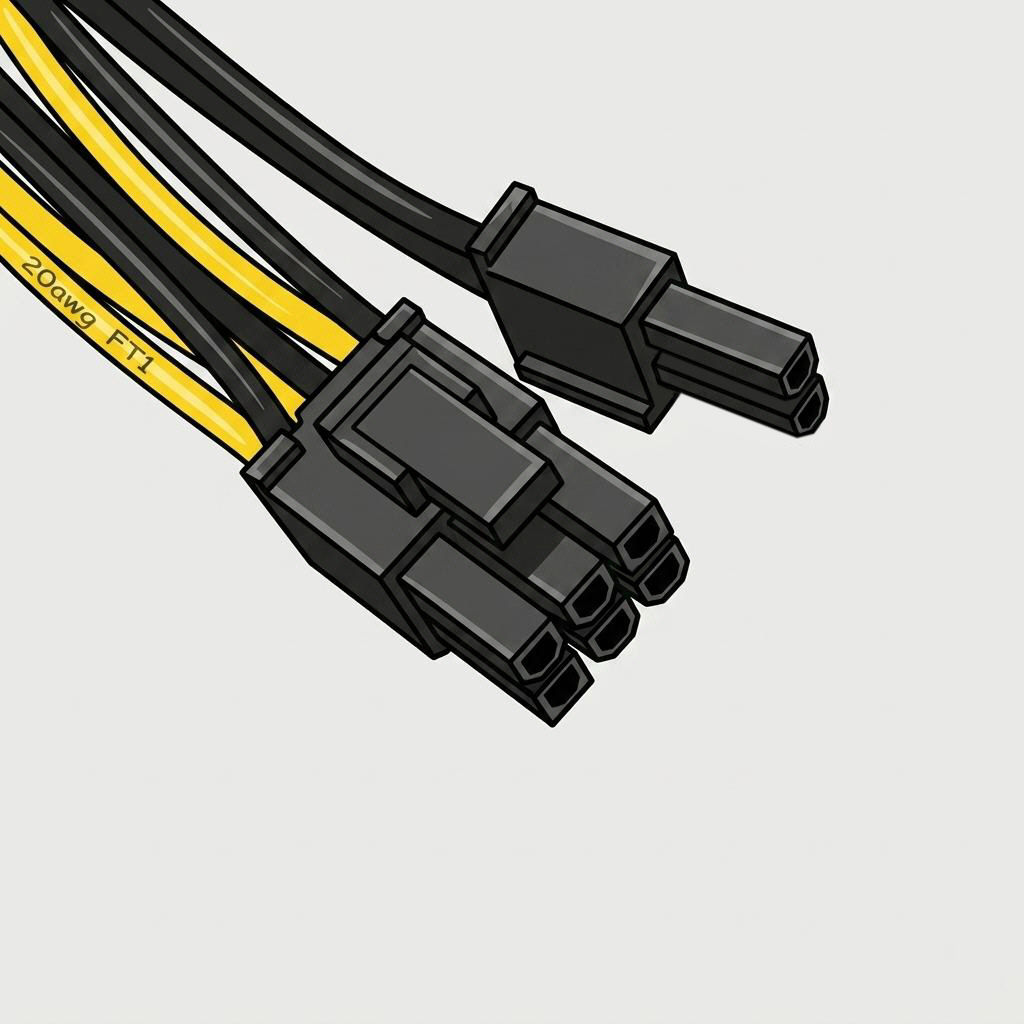
Powers dedicated graphics cards. Entry-level GPUs may use one 6-pin; high-end cards can require two or more 8-pin connectors. Always check your GPU’s specific requirements.
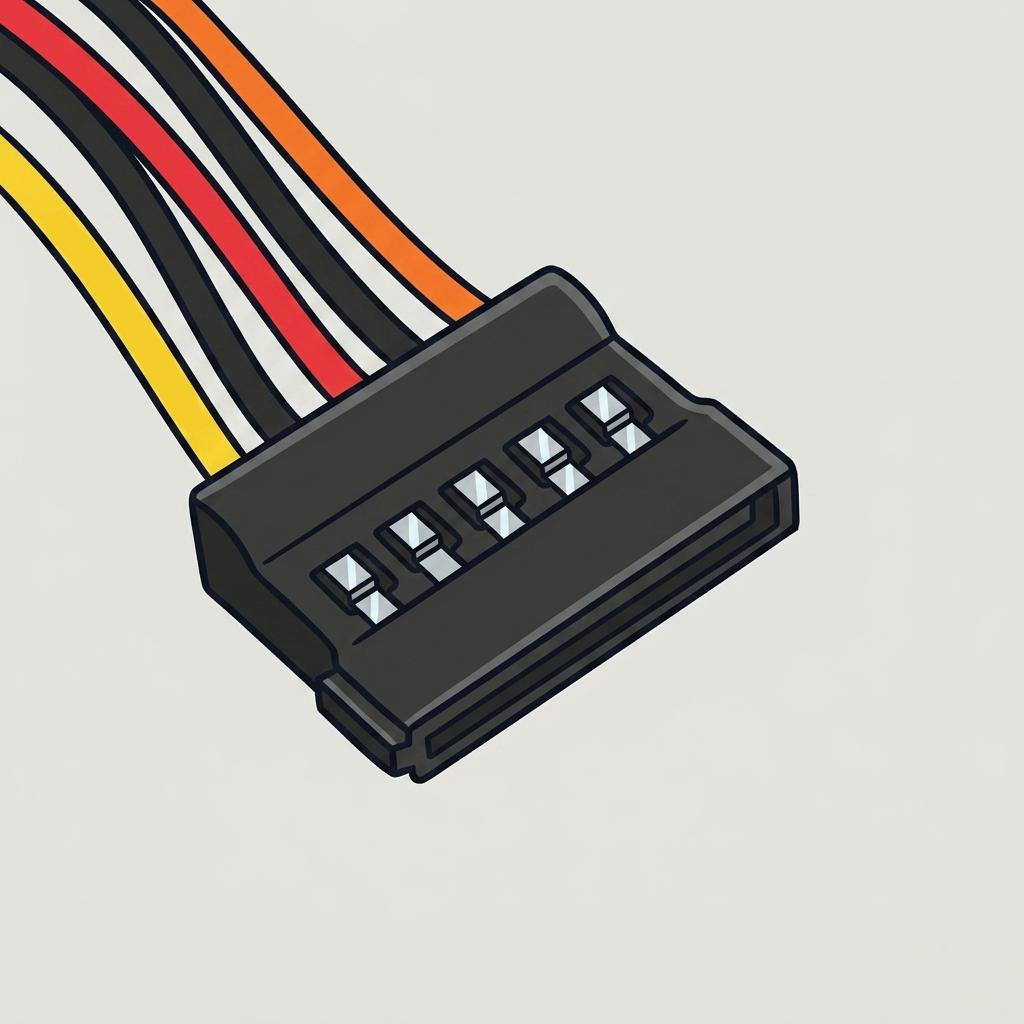
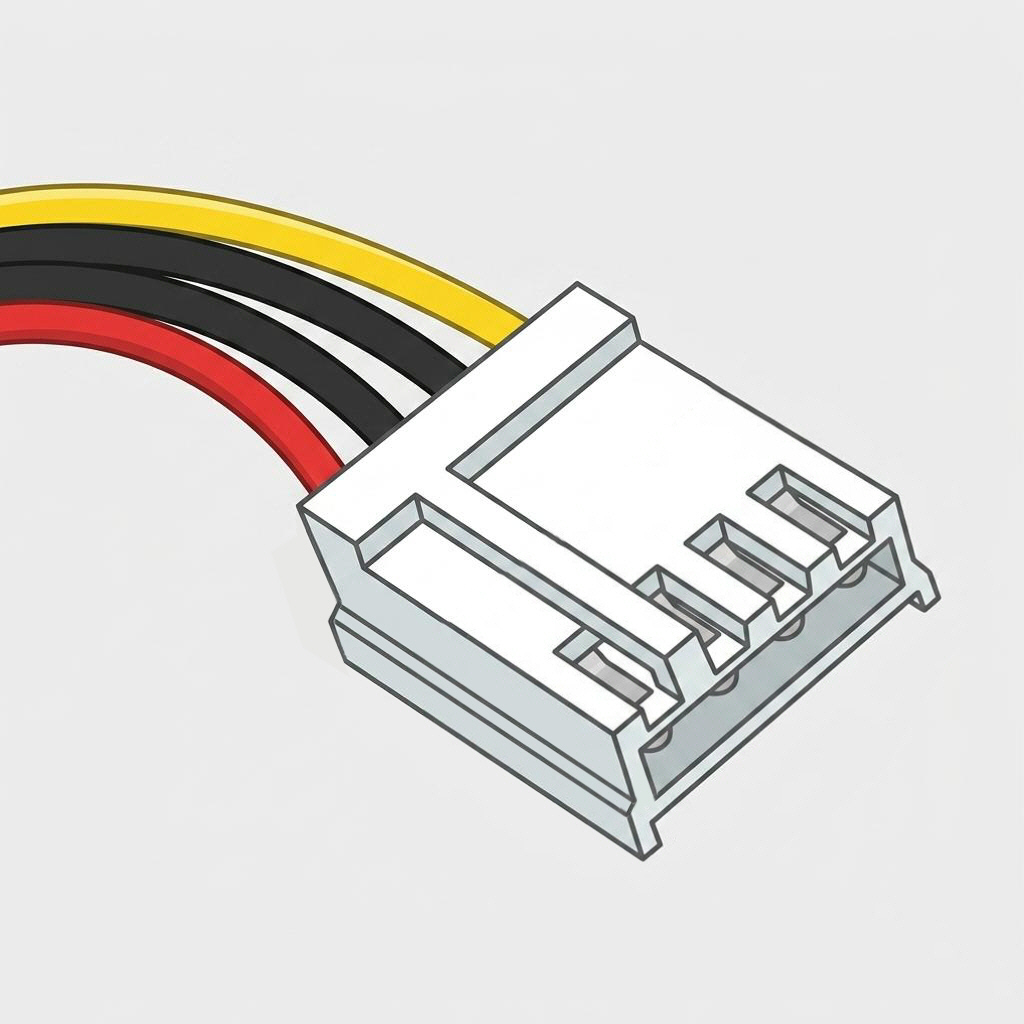
Powers SATA hard drives, SSDs and optical drives. PSUs typically provide multiple SATA connectors on a single cable chain.
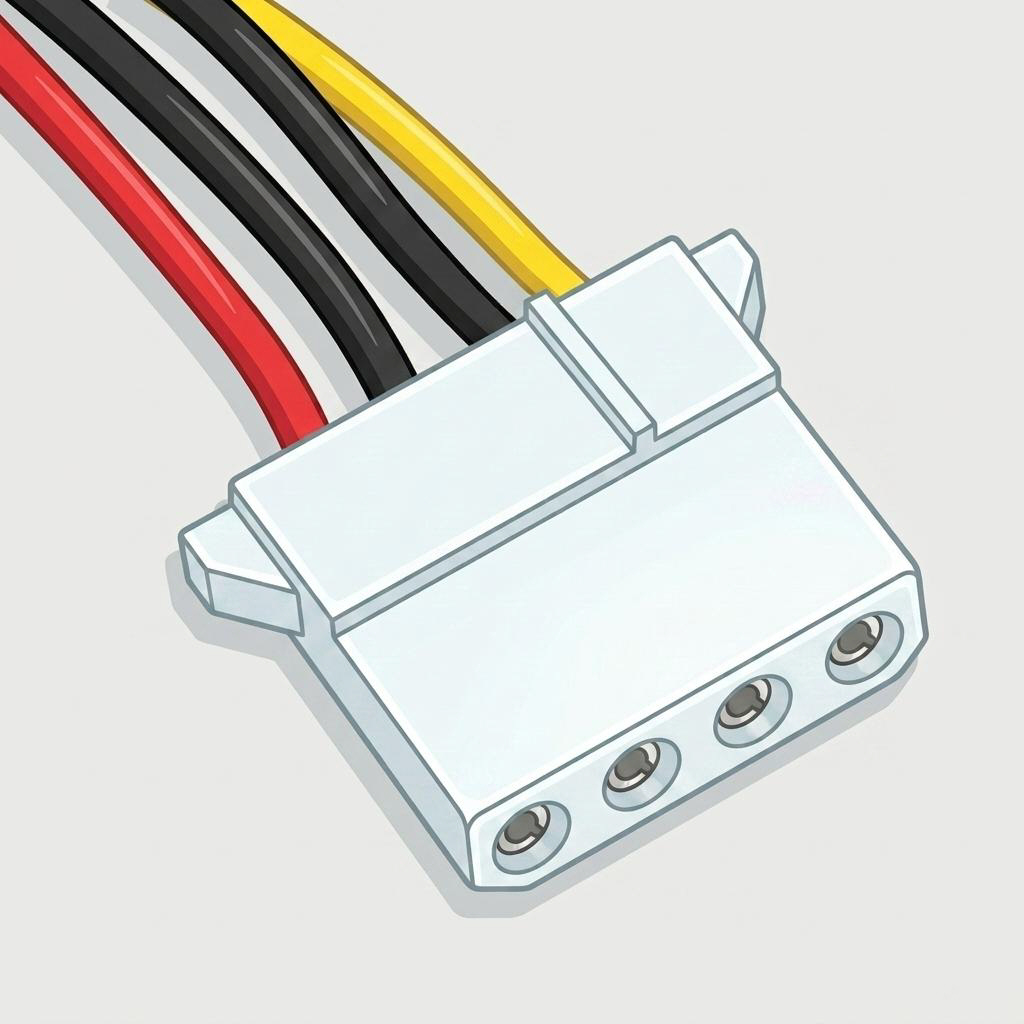
Older connector type still used for some fans and accessories. Less common in modern builds but present on most PSUs for compatibility.
A small 4-pin connector historically used for floppy disk drives. Occasionally still required for certain low-power accessories and adaptor cables. Also known as a mini-Molex or Berg connector.
A 6-pin auxiliary connector found on some older ATX PSUs and motherboards from the early 2000s. Rarely needed today but still encountered on period-correct or legacy ATX builds.
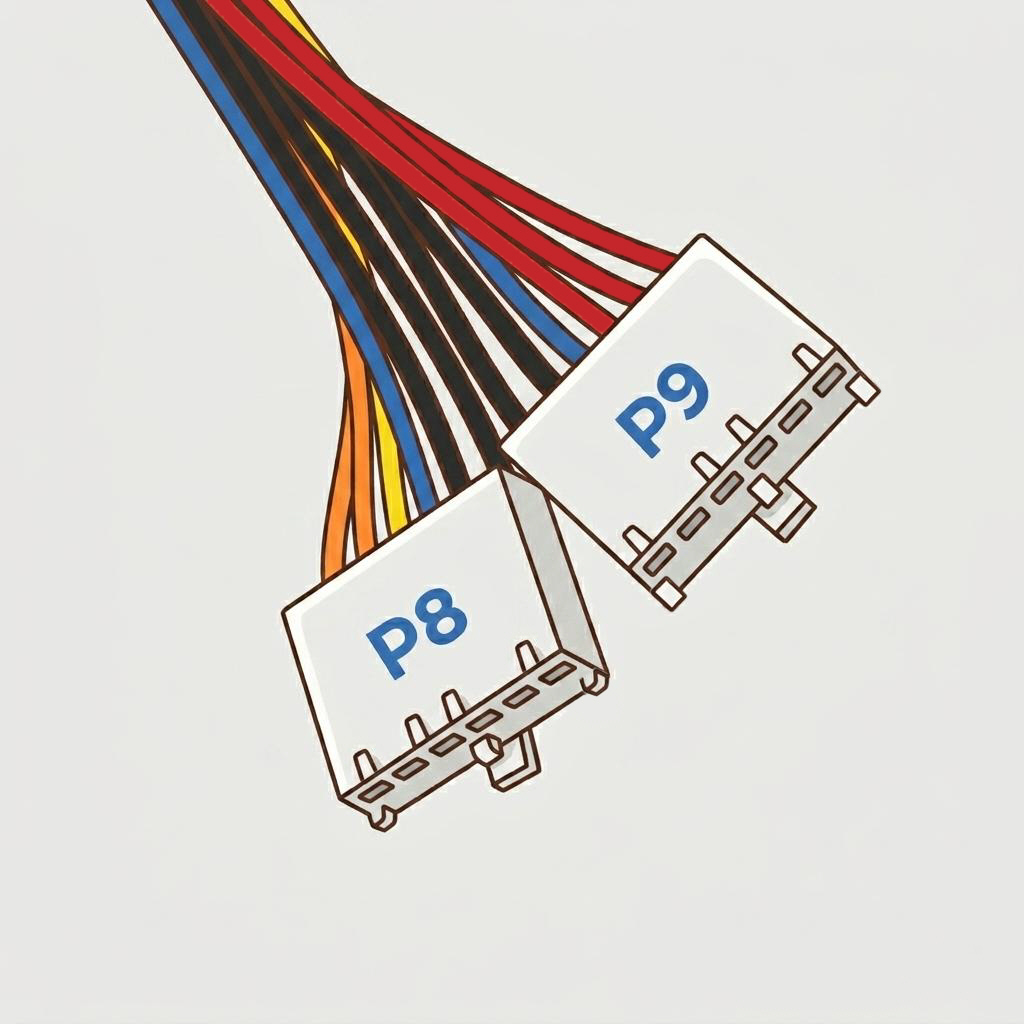
Used exclusively by AT PSUs for legacy and vintage machines. Two separate 6-pin connectors replace the modern 24-pin. ATX-to-AT adaptor cables are available if needed.
An additional power connector found on some AT PSUs, used to supply power to certain legacy peripherals or drive controllers. Less common than the P8/P9 pair but occasionally required on older AT-based systems.
Found on older power supplies to power the unit’s internal cooling fan. Now obsolete — modern PSUs handle fan control directly.
A 6-pin Mini SATA connector for tight spaces. Commonly used in slimline desktops, NAS enclosures, and Mini-ITX systems where a full-size SATA connector won’t fit.
Missing a Connector? Adaptors Are Available
If your PSU is missing a specific connector, adaptor cables are widely available. We stock a full range including Molex-to-SATA, PCIe splitters, 6-to-8-pin adaptors, and proprietary adaptors for Fujitsu, Dell, Acer, QNAP and others. See our Cables & Adaptors range.
Quality, Reliability & What to Look For
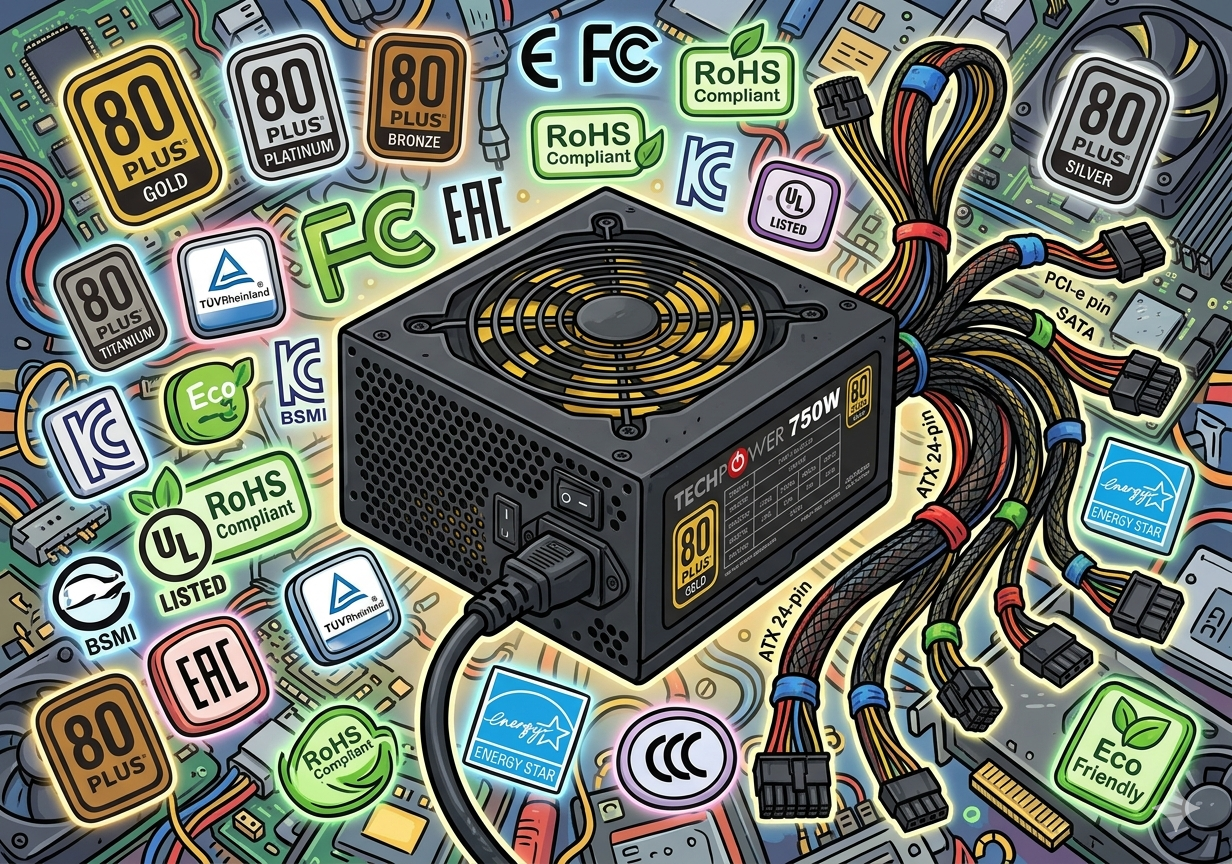
Quality PSUs carry CE, UL and 80 Plus certifications
Not all power supplies are created equal. A low-quality PSU can deliver unstable or “dirty” power, leading to system crashes, data corruption, and even component damage. Investing in a well-built PSU from a reputable manufacturer is one of the best decisions you can make for the long-term health of your system.
Key Quality Indicators
- Stable DC output: A quality PSU delivers consistent, clean DC voltage. Fluctuations cause instability and premature component wear.
- Active Power Factor Correction (PFC): Improves energy efficiency and reduces wasted power. Also ensures compatibility with UPS systems.
- Warranty: Reputable brands offer 2 to 7-year warranties. All PSUs from Vanda Trading carry a 2-year warranty.
- Fan quality and noise control: A good PSU uses a temperature-controlled fan — quiet under light load and only spinning up when needed.
- Safety certifications: Look for CE marking (required in the UK and EU) plus UL, TÜV, or FCC — confirming independent safety testing.
- Input voltage range: Most modern PSUs support 100–240V automatically. Some older units have a manual 115V/230V switch — always set to 230V in the UK.
- Multi-rail vs single-rail 12V: Multiple 12V rails distribute load in demanding systems. For standard home or office PCs, a single 12V rail is perfectly adequate.
Efficiency Ratings: The 80 Plus Standard
PSUs convert AC mains electricity into DC voltages for your PC components. This conversion is never 100% efficient — some energy is always lost as heat. The 80 Plus certification programme tests and grades PSUs by how efficiently they perform at various load levels.
A PSU with an 80 Plus rating wastes no more than 20% of consumed energy as heat — meaning less heat inside your case, quieter fan operation, lower electricity bills, and a reduced environmental impact. There are six tiers:
| Certification | At 20% Load | At 50% Load | At 100% Load | Best For |
|---|---|---|---|---|
| 80 Plus | 80% | 80% | 80% | Budget builds |
| Bronze | 82% | 85% | 82% | Home & office PCs |
| Silver | 85% | 88% | 85% | Frequent-use PCs |
| Gold | 87% | 90% | 87% | Gaming & workstations |
| Platinum | 90% | 92% | 89% | High-end & servers |
| Titanium | 92% | 94% | 90% | Enterprise & enthusiast |
For most home and office users, 80 Plus Bronze offers a good balance of efficiency and cost. If your PC runs for extended periods, stepping up to Gold is worthwhile and can pay for itself over time through lower electricity costs.
Modular vs Non-Modular PSUs
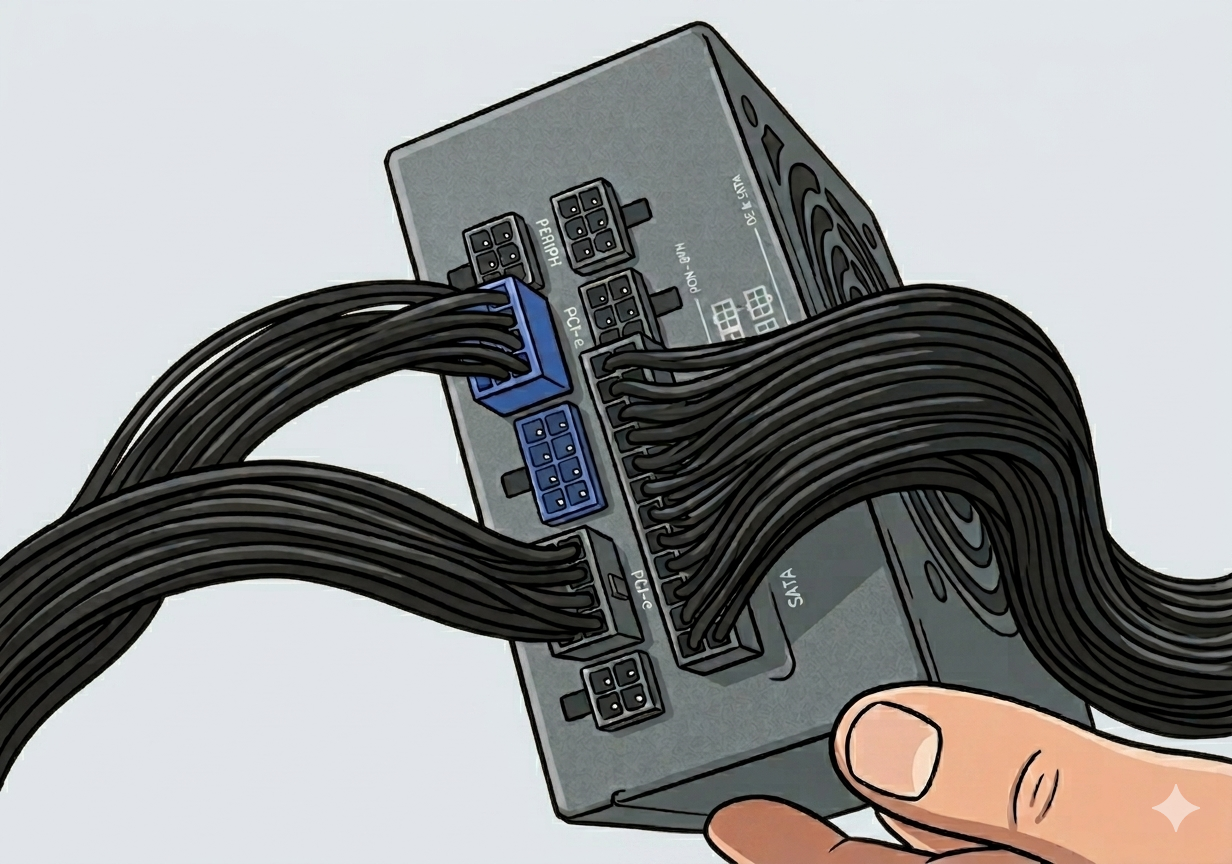
A fully modular PSU — all cables are detachable
One practical consideration beyond the technical specifications is whether to choose a modular, semi-modular, or non-modular PSU. This refers to how the cables attach to the unit.
For replacement or budget builds, a non-modular PSU is a perfectly practical choice. If tidiness and airflow are important — such as a windowed case — a modular unit is worth the premium.
- Non-modular: All cables are permanently fixed. Typically the least expensive. Unused cables must be stored inside the case, which can make cable management more challenging.
- Semi-modular: Essential cables (24-pin ATX and CPU power) are fixed; additional cables (SATA, PCIe, Molex) can be added or removed as needed. A practical middle-ground for most builds.
- Fully modular: Every cable is detachable. Maximum flexibility for tidy cable management and cleaner builds. Higher price point, but ideal for windowed cases where appearance matters.
Quick-Reference Checklist
- Measure your existing PSU or check your case specs and match the correct form factor: ATX PS2, TFX, SFX, 1U, AT, etc.
- Calculate total system wattage by adding up all component TDP values, then add 20–30% headroom. Choose a PSU that comfortably exceeds this figure.
- Verify you have the right connectors: 24-pin ATX (motherboard), 4/8-pin EPS (CPU), PCIe 6/8-pin (GPU), SATA (drives). Use adaptors as a last resort for high-power components.
- Choose a reputable brand with genuine safety certifications (CE, UL, TÜV) and at least a 2-year warranty.
- Check the efficiency rating. 80 Plus Bronze is the sensible minimum; Gold is recommended for PCs in frequent daily use.
- If your PSU has a red voltage selector switch near the power inlet, ensure it is set to 230V before use in the UK.
- Consider a modular design if cable management and airflow are a priority.
- When in doubt, consult our PSU Measurements guide or contact us with your PC model and photos of the existing unit — we are happy to help.